Digitising photos for restoration
Digitising photographs means to make a digital copy of the photo you want to restore. There are two ways of digitising photos for restoration:
- Using a scanner
- Using a camera or phone
Both of these methods are excellent, but scanning stands head and shoulders above taking a photo for restoration.
The information below will help explain.
Digitising photos by scanning
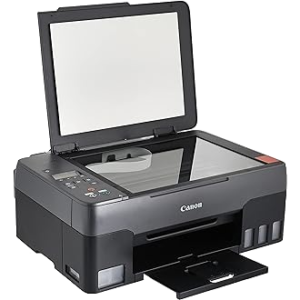
The scanner should be your first choice when digitising photos for restoration.
Most domestic scanners or all-in-one printer/scanners can scan up to A4 at 1,200 dpi. So a 6″ X 4″ (150 mm X 100 mm) photo once cropped provides a 34 megapixel image. There are few cameras that are able to do that, even if perfectly set up and lit properly.
So, if you have a scanner or access to one, we recommend you use it rather than a camera.
If you’re new to using a scanner, there are many “How to” videos on YouTube, as well as tutorials on how to change the DPI settings in most forms of software.
Scanning software provides a number of options when saving the image too. Basic scanning software provides provisions for numerous file formats, which means you are able to give us the best digitised image possible for restoration.
Various file types to save to
Even the most basic scanner software packages allow you to save in multiple formats:
- As a JPG or JPEG image. This are highly compressed to keep the size of the file as small as possible
- As a PNG, TIF or BMP. These are also referred to as “lossless”, which means that they hold more information about the image, making them bigger, but much better.
- As a PDF. This would be a no-no. PDF files are mainly for documents and more often than not, do not hold particularly good copies of the image, certainly not good enough for restoration purposes.
Therefore, when saving your scan, you should save in an available lossless format, such as *.tif, *.png or uncompressed *.bmp.
Please be aware that if the photograph you are scanning is on a textured paper, the scanner will pick that up and it may not be able to be removed. Also, bear in mind that scanning at a high DPI will obviate even the slightest blemish at full size, will take longer to restore and will therefore be more costly than one at 300 dpi.
Digitising photos by photographing
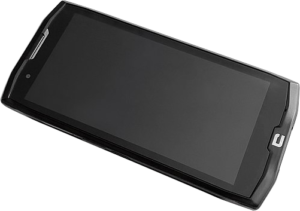
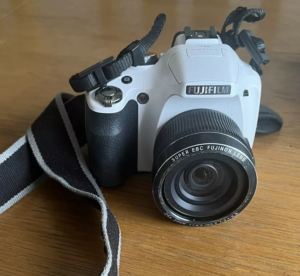
Digital photographs of the photo or photos you want restored are perfectly acceptable. However it is more difficult to obtain good, clean images. This does mean the restoration process becomes more involved and can be more costly.
There are several reasons for this.
Angles
 The first is that when photographing a photograph, the angle the camera is held when taking the shot, may not be square on. The result is distortion of the overall shape of the photograph and therefore, the details in it.
In addition to this, if the photograph is curled or bent in some way, distortion of the details is caused, as well as casting unwanted shadows or highlights. It may not sound like much, but it adds extra work we have to do in restoring your photograph.
We therefore ask that when you upload a photo of the photograph you want restored, you include the dimensions when uploading. It ensures we can restore your picture at the correct size and ensure the shapes and proportions of everything in the photo are correct.
Light
 Lighting should be such that it doesn’t cause an uneven spread across the photograph. If the lighting isn’t good, try another room or somewhere else altogether.
If the photograph is under glass, this too can cause issues. The glass and lighting together can change the colours. If possible, take the photograph from behind the glass and photograph it on its own.
The most important thing to remember is never use the flash. Some cameras and phones turn the flash on whether you want it or not. If this is the case, it’s definitely wise to ensure that lighting where you’re photographing is adequate. If the flash does go off, don’t be surprised if something like what’s shown in the picture happens. The reflection causes over exposure, effectively obliterating all the detail beneath.
Focus
This is one of the aspects of using a camera or phone to digitise your photograph. It cannot be stressed enough how important focus is when taking a photograph in general, but in this instance, it can mean the difference between having something usable and not.
Phones and cameras compared to scanning
Sometimes using a phone or camera is the only option when digitising photos. However, this method does have limitations.
| Scanner | Camera/phone |
|---|---|
| Requires no outside lighting | Requires the photo to be lit evenly with no light reflections. Flash must not be used |
| Maintains the aspect ratio (height and width) | There is no way of knowing the actual size the photograph should be from the picture from a camera or phone, which is why we request the dimensions. |
| Requires no focusing. | Can be difficult to focus on photos, especially if the photo itself is not in focus to begin with. |
| Images can be produced in a variety of resolutions | Smaller photos will have proportionately more pixels for the image data than larger photos |
| The bigger the photo, the greater the number of pixels | To reproduce the photograph to its original size when bigger than a 6″ X 4″ (150 mm X 100 mm), care must be taken to ensure that the camera or phone’s resolution is sufficient to create enough pixels (see below). |
| Number of pixels for a 6″ X 4″ (150 mm X 100 mm) photo
300 dpi = 2.1 mega pixels |
This is very much dependent upon the resolution of the camera or phone itself. Since these vary so much, it’s not possible to say.
What is possible, is that a 3.1 Mega pixel camera or phone would be able to take print ready photographs of a 6″ X 4″ (150 mm X 100 mm) photo, but not really any photo larger. |
