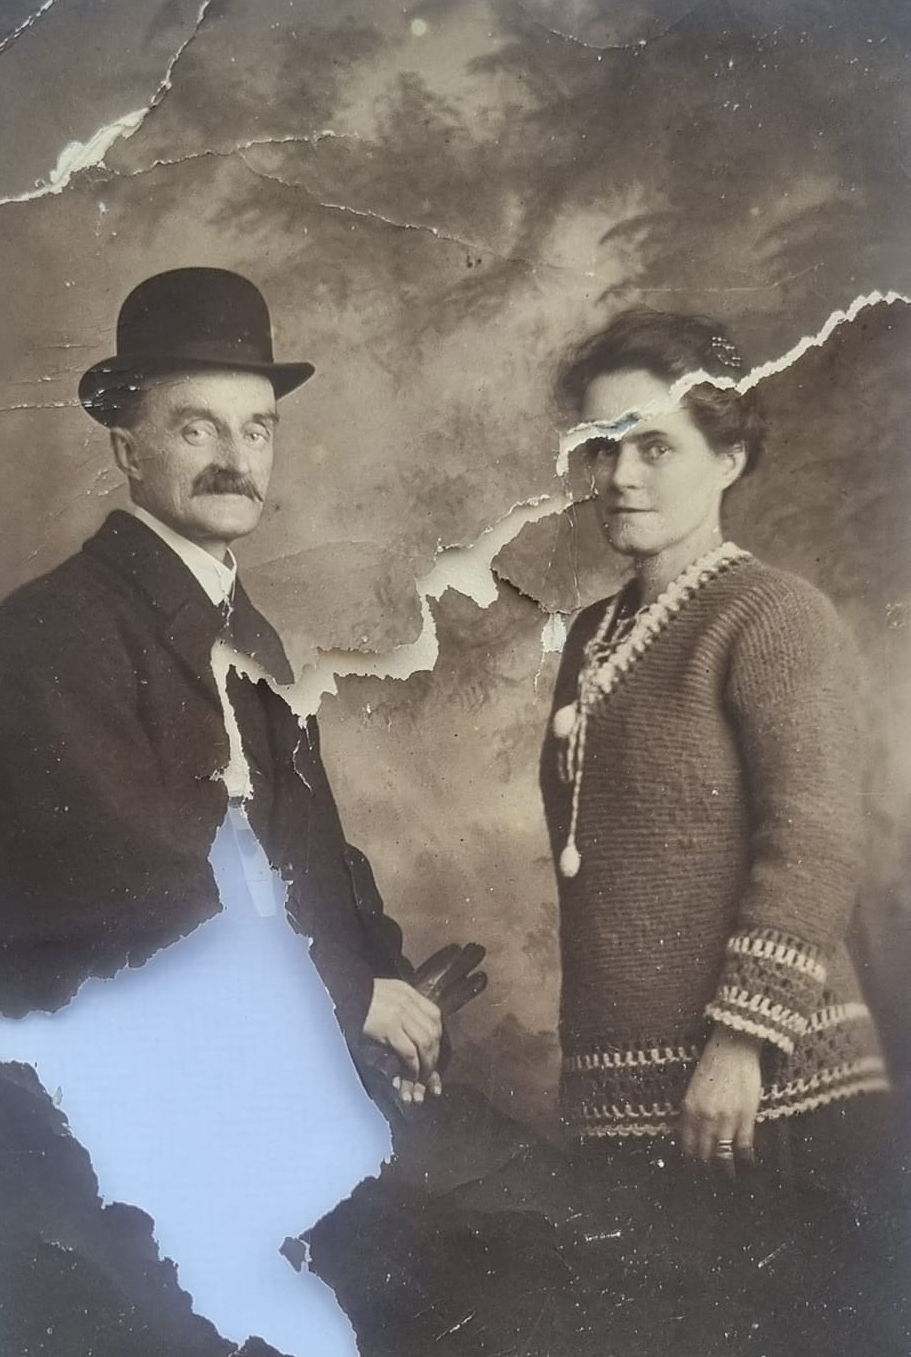
 This photo restoration was a huge challenge. It had literally been torn to shreds and a large chunk of it was missing.
I’ll confess that I restored this twice. The first time I restored this photograph, I didn’t take into account that it needed realigning.
Realignment
The photo above and below the jagged diagonal rip needed realignment. Not a simple task, since the tearing had to be cut very precisely, before the pieces could be manoeuvred into position. Thankfully, although the tear was jagged, mostly it went back together and stopped the woman from looking like she worked for Tefal in the late eighties.
The background
 One thing about photo restorations is there’s often a fair amount of cheating involved. Backgrounds for instance, where it’s not recognisable specifically, can often be repaired and replaced by sampling the area around the damage. This is what I did with the background. It’s just a stormy sky or clouds and while the end result is not identical to the original, it’s still a stormy sky or whatever. I changed it slightly, but I don’t feel it altered the overall look and feel.
The gentleman
He looks like an easy fix, but needed some deft touches to bring his arm back and recreate the front of his suit jacket.
Some parts were just like “joining the dots”. The further down I went, the less I could make out with any accuracy, which is why I shortened the finished image.
It seemed the best I could get from his hands down was replacing darkness. This to me was like wasted space and poor composition. That was my feeling anyway.
Facial touch ups in photo restorations
The last part to repair was the lady’s face and wasn’t something I was looking forward to. Often with tears and creases, they have a nasty habit of obliterating features like the eyes.
This means that faces are always at risk of losing their likeness during a repair. Thankfully, this was only a partial reconstruction. So, what I did only amounted to a touch-up; a little airbrushing if you will. There was a lot that could have gone wrong, but this time I think it turned out well.
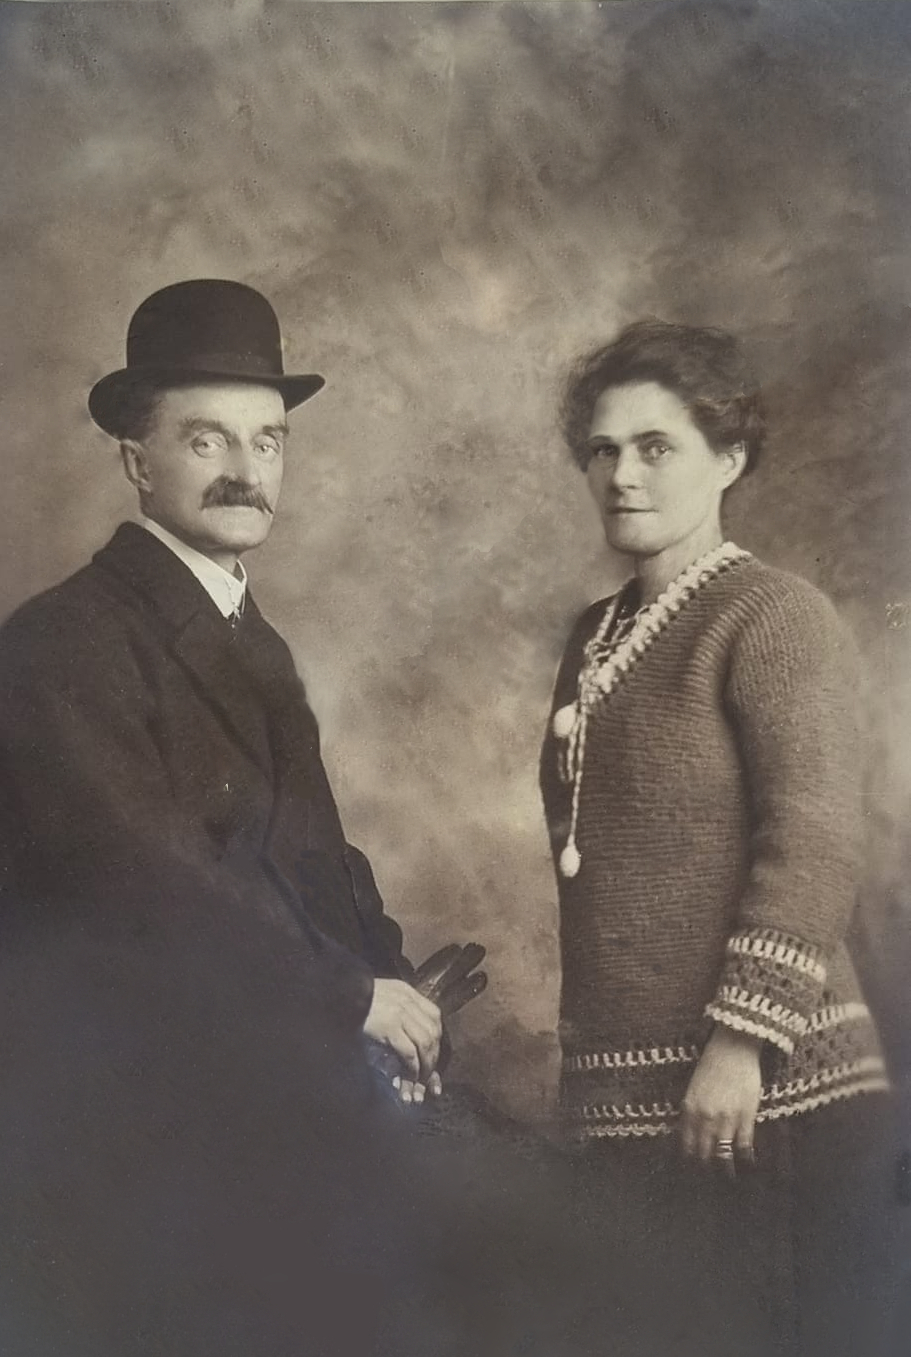
The finished work was well received by the client, who was more than happy to let me display it here!

Leave a Reply
You must be logged in to post a comment.